Introduction #
This guide is a follow-up to my installation guide, which left us with a fresh Fedora KDE install ripe with potential. I’ll walk you through the standard configuration changes I like to make to Fedora (and really any distro). We’ll be using Chris Titus’s amazing Linux Toolbox (LinUtil). This thing is super handy—it makes first-time configuration and customization of your fresh install a breeze.
Set Your Power Mode #
This should be done off the bat if you’re on a desktop to let your hardware run as fast as it can. Set this to Performance mode and leave it there.
- Press Meta (Windows Key) + B to cycle through power modes until you hit Performance Mode.
- You can also find this in the task tray under the “Show Hidden Icons” arrow on the right.
RPM Fusion #
The first thing we want to do is go ahead and enable the full RPM Fusion repository. This gives you access to more third party packages (we will need this later for installing multimedia codecs) We are going to run two commands, just paste them one at a time into your terminal.
Free repository #
sudo dnf install \
  https://download1.rpmfusion.org/free/fedora/rpmfusion-free-release-$(rpm -E %fedora).noarch.rpm
Nonfree repository #
sudo dnf install \
  https://download1.rpmfusion.org/nonfree/fedora/rpmfusion-nonfree-release-$(rpm -E %fedora).noarch.rpm
The first time you attempt to install packages from these repositories, the dnf utility prompts you to confirm the signature of the repositories. Confirm it.
Audio Tweaks #
I use an analog audio output from my system. And I have noticed every 5 or so minutes the audio driver will sleep for power-saving, and cause a popping sound from my speakers. This is from the Pulse-Audio driver snoozing, in combination with the audio device on my motherboard – and my 90’s sound system doesn’t vibe with that.
If you notice this, here’s a one-liner that takes care of that. It will take effect on the next reboot.
echo 'options snd_hda_intel power_save=0 power_save_controller=N' | sudo tee /etc/modprobe.d/audio_disable_powersave.conf > /dev/null
This tells the driver not to sleep anymore
Graphics Drivers #
This changes a tad whether you have an AMD or Nvidia GPU.
AMD #
– these drivers are just included in the kernel, so no action is required here from you!
Nvidia #
– if you have a green team card, you are not so lucky. Nvidia cards will require some drivers to run at their peak. Never to fear, ill show you how
I like to follow RPM Fusions guide on this, you can find that here: https://rpmfusion.org/Howto/NVIDIA
If you have a card more recent than the 700 series, it boils down to just a couple of commands. If you are on a laptop, or have an older card, please consult the guide for your use case.
Drop this into your terminal:
sudo dnf update -y # and reboot if you are not on the latest kernel
sudo dnf install akmod-nvidia # rhel/centos users can use kmod-nvidia instead
sudo dnf install xorg-x11-drv-nvidia-cuda #optional for cuda/nvdec/nvenc support
Workarounds for some Nvidia issues I have found
My machine has a commonish problem from what I can tell of the machine sleeping the displays, and upon wake they just don’t come back. This is an issue with the Nvidia drivers. I have found a workaround that seems to do the trick for me. Feel free to implement if you encounter a similar issue
I have heard that the newer cards fare much better on Linux, despite the older ones being just as supported. I have a 1080ti, and there are certainly some quirks I did not experience with an AMD card
-
I have made a handy one-liner that builds a custom conf file as well as configures it with the added option:
echo 'options nvidia NVreg_PreserveVideoMemoryAllocations=1' | sudo tee -a /etc/modprobe.d/nvidia.conf > /dev/nullThis seems to help the driver save into memory better
-
Run the following command to regenerate the initramfs file to load the changes:
sudo dracut --regenerate-all --force -
Then for me, the issue was fixed for sleep. But the problem still persisted when KDE just turned the display off, but did not sleep the computer. I disabled this in the power settings.
These steps worked for me, and all seems to be well now.
Running LinUtil #
Running LinUtil is very easy. It’s found here:
👉 https://github.com/ChrisTitusTech/linutil
Just dump this command into your terminal:
curl -fsSL https://christitus.com/linux | sh
It’ll launch a handy little GUI. Use your arrow keys to move to the System Setup option from the left-hand column. You’ll see Fedora listed as the first item. Go into that.
From here, we’re picking three options as shown below:
Configure DNFMultimedia CodecsBtrfs Assistant
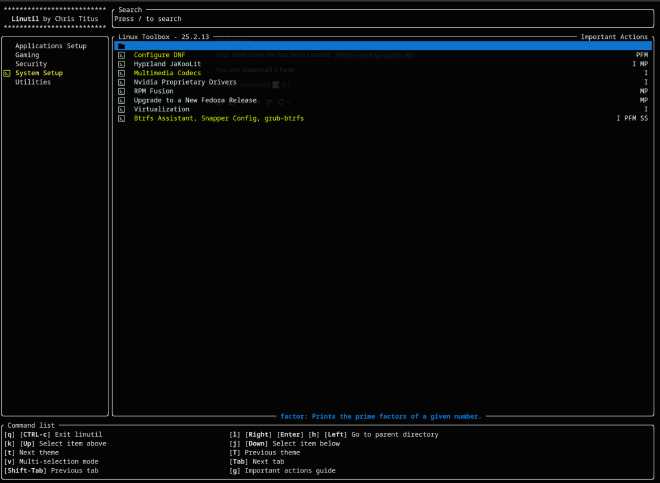
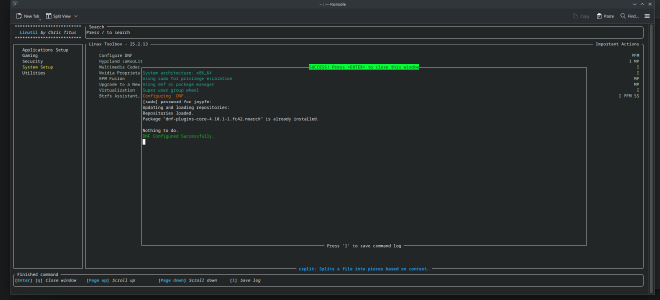
DNF is Fedora’s package manager. Configuring it enables parallel downloads for speed.
Multimedia Codecs help avoid media playback issues later.
Btrfs Assistant sets up backups really easily.
Run each by pressing <Enter>, then confirm with Y if asked. It does not matter the order you run them.
**NOTE: Btrfs Assistant, will ask you to Confirm each prompt by hitting Y **
Some more on Backups (Btrfs Assistant) #
I like to get backups going ASAP. Linux is awesome, but it’s not immune to “oopsies.” Backups give you peace of mind.
Chris has defaults for retention, etc. Deep-dive backup strategy is out of scope here, but plenty of guides exist if you want to go deeper.
Running this command will automatically take the first snapshot, then setup recurring ones. It will also add grub options, so they within the grub menu “you can actually load these snapshots right from the GRUB boot menu. Pretty cool I think
Pimping Out Your Terminal #
Custom Bash Prompt #
The terminal is home for Linux users—it’s our warm, comfy retreat from the GUI world. So let’s make it nice. Return to the Linux Toolbox:
Under Application Setup, pick:
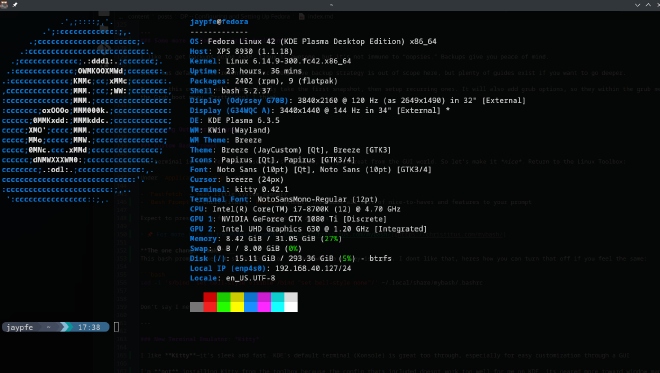
Fastfetch– neat little system summaryBash Prompt– Chris Titus’sMyBashprompt. This adds all sort of nice-to-haves and features to your prompt
Expect to press Y a few times as it installs add-ons.
For more info on the MyBash Prompt: https://christitus.com/mybash/
The one change I make
This bash prompt makes it so the Emulator flashes when a miskey is typed. I don’t like that, here’s how you can turn that off if you feel the same:
sed -i 's/bind "set bell-style visible"/bind "set bell-style none"/' ~/.local/share/mybash/.bashrc
Don’t say I never did nothing for you.
New Terminal Emulator: Kitty— #
I like Kitty—it’s sleek and fast. KDE’s default terminal (Konsole) is great too through, especially for easy customization through a GUI
I’m not installing Kitty from the toolbox because the config that’s included doesn’t work too well for me on KDE, its geared more toward window managers like Hyprland.
Install it manually:
sudo dnf install kitty
I like the default Kitty layout, but I like to add a smidge of transparency. Create a config file:
nano ~/.config/kitty/kitty.conf
Paste this:
# Transparency
background_opacity 0.85
background #000000

# Foreground
foreground #d0d0d0

# Cursor
cursor_shape block

# Font
font_family FiraCode Nerd Font
bold_font auto
italic_font auto
bold_italic_font auto
font_size 12.0

# Scrollback
scrollback_lines 10000

# Ligatures
enable_ligatures yes

# Tabs
tab_bar_edge top
tab_bar_style powerline
tab_title_template "{index}: {title}"

# Padding
window_padding_width 5
Boom. Beautiful terminal.
Changing the GRUB Theme #
Last but not least—make GRUB look cool.
In the Application Setup of the Toolbox tree, select Grub Theme.
You’ll get to choose from 6 themes. I like Fallout, but try them all—you can rerun the script anytime.
Installing Software #
I want to talk a little about how to install software in this environment for the new users. You have already seen the Discover Store if you followed my first guide when you updated your system. And in this guide you have seen us install software through the terminal.
There is nothing wrong with either of these two methods, and you may value one over the other personally. They actually use the exact same package manager under the hood: DNF. Discover is just a GUI that sits on top to make it a bit more visually appealing. You can do everything you can do in either one.
Recommended Software #
Here are some good software that I use on my system:
OnlyOffice– This is a great free office suite that has more compatibility with Microsoft Office than Libre Office does, as the expense of a few features.Remmina– A good GUI client for SSH, RDP and moreKateA stronger text editor than the default. Akin to Notepad ++ShotcutThis is a video editor that is free and open source, and pretty solid
A Note About Gaming #
There’s a good option under System Setup for installing Gaming Dependencies. This grabs things like Steam, Lutris, and more in one go.
I dual-boot with Windows for gaming, so I usually skip this—but Linux gaming is honestly pretty legit now. So, if you want to dip your toes in the pond, that Toolbox option is a good place to start
And hey—if it all blows up, you’ve got backups now, right? 😄
Steam is also available as a flatpak from the Discover store. This is personally how I would run it, just to avoid having a bunch of dependencies on my machine that I don’t need anywhere else. BUT there are some trade-offs to this too. You can find all sorts of good stuff about this online. And to be honest, if you are new to Linux, install them both! Why not?
Thanks for reading!
My next post will be about configuring KDE—appearance tweaks, shortcuts, and more.
Stay tuned.