Introduction #
Customizing KDE is a great way of making your environment your own. I have tinkered with different options over the course of my tenure with KDE, and I’ve come up with some KDE tweaks that I like quite a bit. It’s nicer to look at, as well as making me more productive. Stuff like icon packs, color tweaks, and setting up some keyboard shortcuts are all great starts.
NOTE – This guide is intended as a starting point for new adopters of KDE. It only scratches the surface of the amount of tweaks and customizations you can make. You are very encouraged to just poke around and mess about!
Theme and Color Tweaks #
KDE lets you change just about everything, and you can download all kinds of custom themes. That said, I usually recommend sticking with the default KDE themes. You can go wild with third-party themes, but they’re not always quite as stable as they are not developed and tested by the KDE team. Doesn’t mean you can’t give a cool theme a whirl though!
-
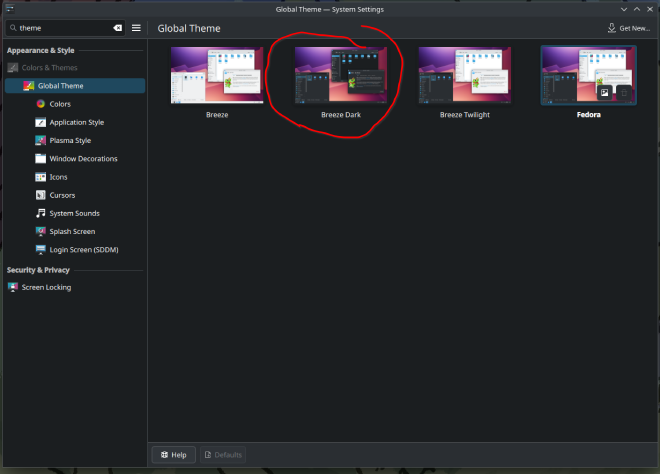
Head into System Settings and search for “Theme.”
-
You’ll land in the Appearance and Style area.
-
I usually switch the global theme from the Fedora default to Breeze Dark—it just plays nicer with the other tweaks I like to make later.
-
Hop over to the Colors tab right below this one from the left-side menu and pick Breeze Dark again.
-
I personally tweak the color scheme a bit to darken the taskbar, especially since I like my taskbar up top.
-
To do this, click the pencil/edit icon, then change
Window Backgroundto#1d1f22. That gives me what I am after.
KDE will prompt you to save this as a custom theme, so no worries about breaking the default.
Tip: Sometimes KDE acts up and doesn’t apply your custom color profile right away. Just switch to another profile, then back to yours, and it should take.
Icons #
I am not the biggest fan of the default icons. They are just a little meh. I like to add just a touch more something-something to them.
-
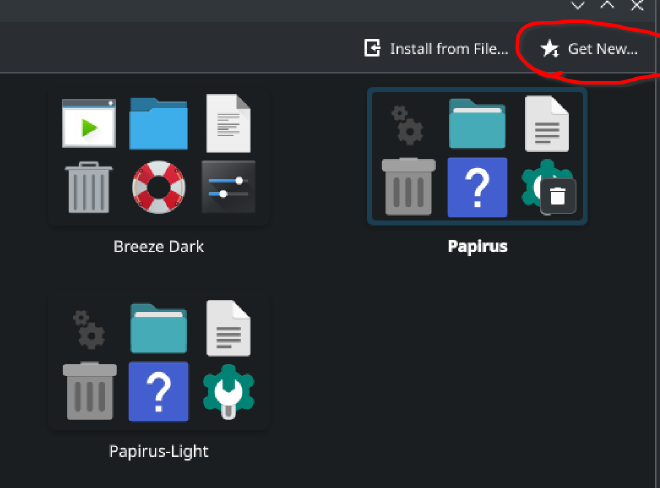
Head over to the Icons tab on the left, just a few clicks down from Colors.
-
Click Get New… (top right corner).
-
I go with Papirus.
-
To install one, just click on it, and hit Install from the top right corner.
-
Some themes might present some different color options—just pick the one you want and install them.
-
I like the Cyan Folders variant of the Papirus set.
-
Once you have them installed, just click on it from the icon section and hit apply, much like we did with the theme and the color.
SDDM (Login Screen) #
-
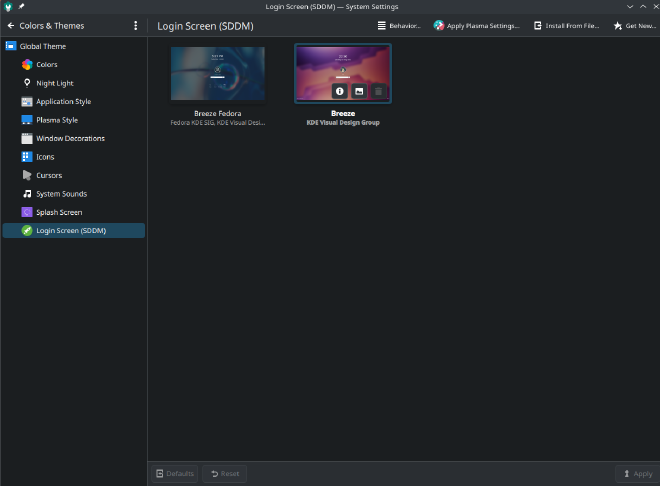
Walk down to the Login Screen (SDDM) settings in the sidebar.
-
I’m not a huge fan of the Fedora out-of-the-box login screen, so I swap it out for the standard Breeze one.
-
Again, just like everything else, just click the theme, then click apply.
-
You can also install more SDDM themes here, just like you did with the icons.
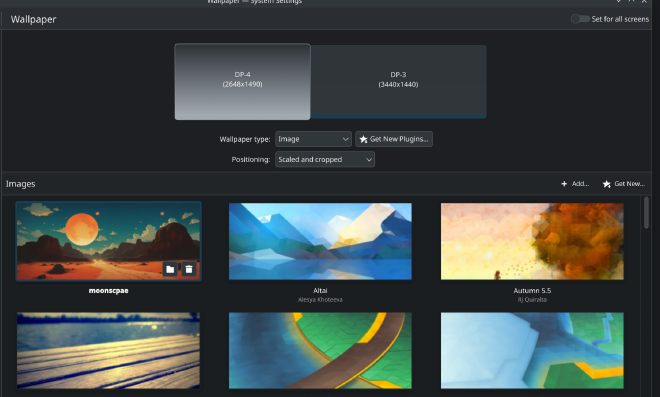
Main Wallpaper #
-
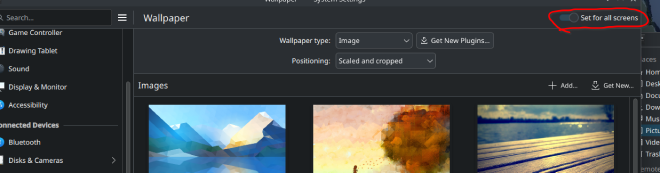
Exit out of the colors and themes settings and search for Wallpaper in the main settings.
-
There’s a checkbox in the top-right for “Set for all screens”—flip that on if you want the same background across multiple monitors.
-
KDE comes with some decent wallpapers, plus options for slideshows and such.
-
Personally, I like to pull my own from r/WidescreenWallpaper.
-
Click the Add… option and navigate to where you saved your wallpaper.
-
Double-click it, and it’ll show up in the list.
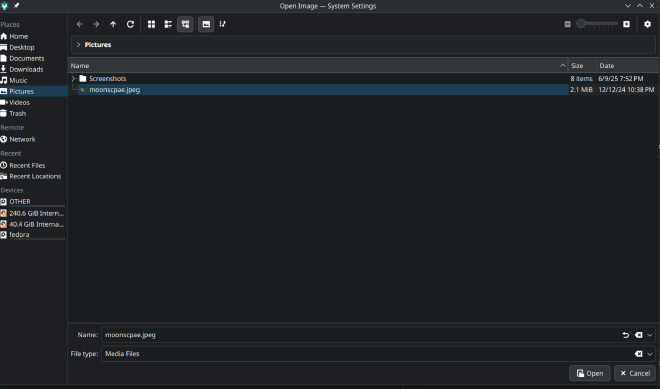
-
Once it’s there, select it and hit Apply.
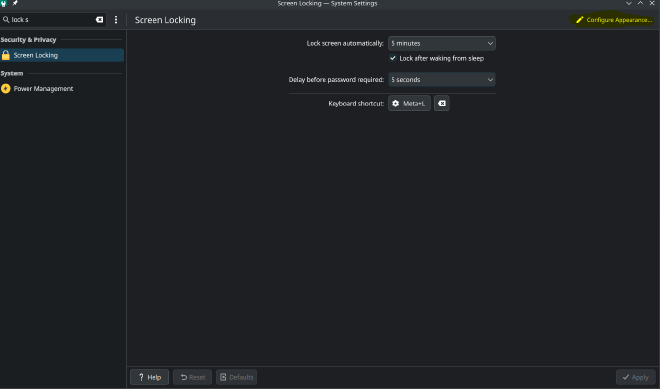
Lock Screen Background #
Changing the lock screen background is a bit more annoying than it should be.
-
You’d think it’s in the same place as wallpaper—but nope.
-
Head into Screen Locking settings under privacy.
-
Click the Configure Appearance button inside that menu to change the lock screen background.
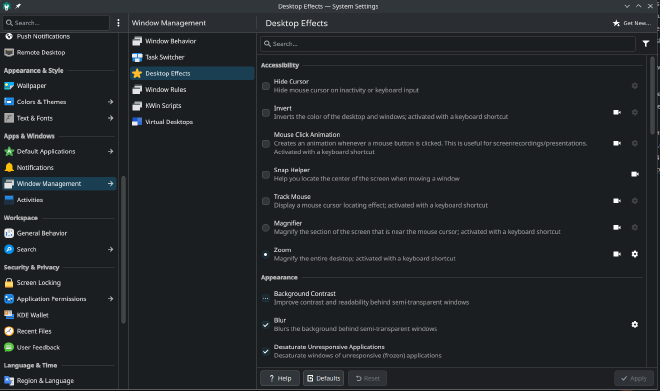
Kwin Tweaks #
Kwin is the Window Manager for KDE. It controls how apps are drawn, and presented on your screen. KDE lets you tweak a bunch of this and add some fun and neat effects.
Come into this area, and check out some of the cool options you have. Windows can explode when you close them, they can shake around with Wobbly Windows, and all sorts of other neat things.
Virtual Desktops #
Virtual desktop settings are found just 3 options down from the Desktop Effects.
Virtual desktops, if you have not used them, are pretty powerful—they allow you to switch between different desktops all on your same machine. So you can have different applications still open, but not taking up desktop space.
If you have used them, you know how powerful they are, and they can be configured here.
Shortcuts #
One of the first things I do on any fresh install is set up my keyboard shortcuts. They massively boost productivity, and sometimes they may override some of the defaults set by KDE, but that’s fine by me. Your mileage may vary.
What I Use: #
Meta + X→ Launch terminal (Kitty for me)Meta + Q→ Close current windowMeta + B→ Launch browser (Firefox)Meta + F→ Maximize Application
To Set Them Up: #
-
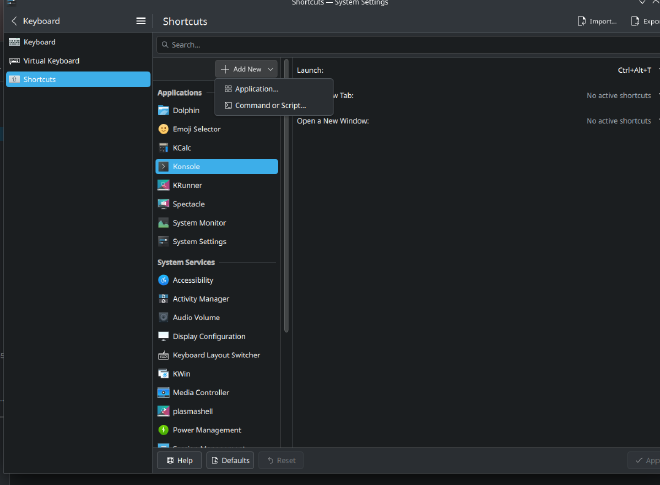
Search for Shortcuts in the KDE menu.
-
Click Add New > Application.
-
Search for your app (e.g., Kitty), hit OK.
-
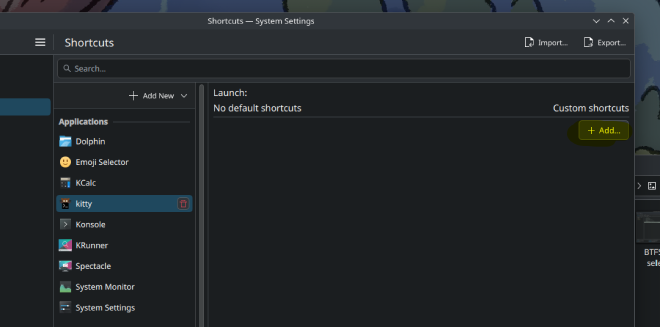
It’ll now appear in the left panel—click it, then Add.
-
Press your desired key combo (e.g.,
Meta + X), and hit Apply. -
For non-app shortcuts like Close Window, search “Close” in the top bar, find it under KWin, and repeat the same process.
KDE might warn you if your shortcut is already taken—just overwrite if you’re cool with it.
Seriously, poke around this menu. KDE has a ton of shortcuts built-in. Learning how to navigate with shortcuts is hugely powerful.
Tuning the Screen Edge Stickiness #
KDE has a feature that has the mouse stick to screen edges between monitors in a multi-monitor setup. It is there to help overshooting between monitors. This is a neat feature, but I don’t like it personally. Luckily, just like everything else, you can change it.
-
Head over to the Mouse & Touchpad settings.
-
Find the Screen Edges area.
-
Look for Edge barrier—it is measured in points.
-
The lower this is, the smaller the sticky barrier is.
-
You can try a lower point value if you still want the feature, or just lower to
0to disable it.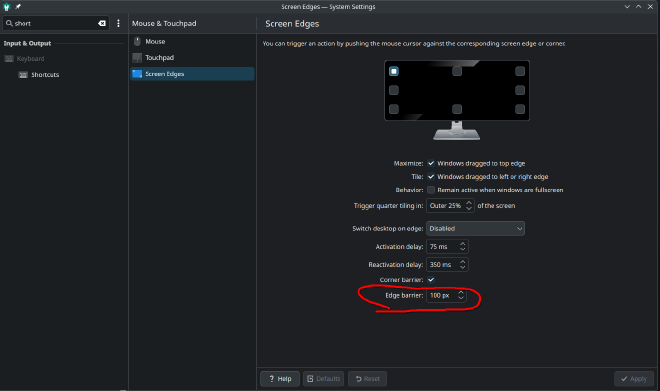
Messing with Widgets #
Finally, we get to widgets.
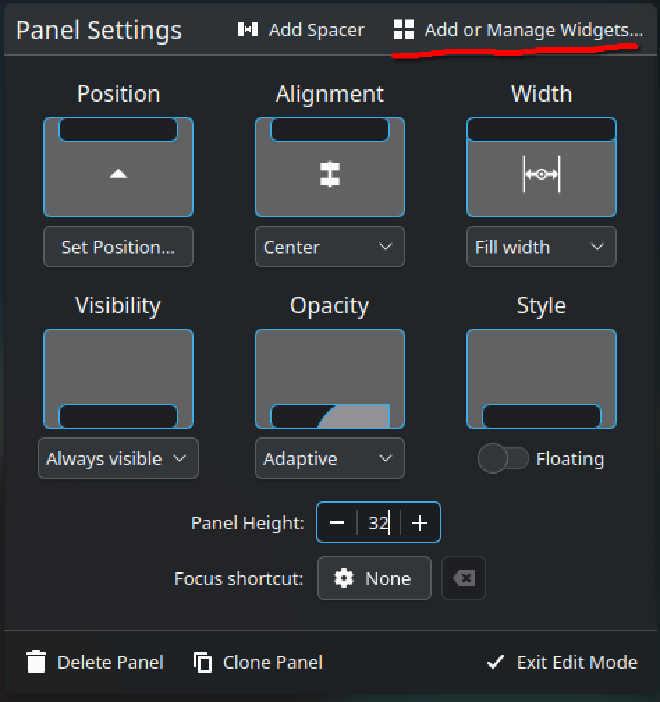
Right-click the taskbar, then click Show Panel Configuration. From here, you can move stuff around, add spacers, performance monitors—whatever you want.
What I do #
- Pin the taskbar to be fixed (not floating)
- Reposition, resize, and remove some of the default icons
- Put the taskbar on top
- Add some system monitoring widgets (e.g., CPU usage)
Example: Adding CPU usage #
Here’s an example of adding a new widget to the taskbar to get you started.
-
Open up the Panel Configuration as told above.
-
Click the Add or Manage Widgets button like shown in the screenshot below.
-
On the left side of the screen, you will see all sorts of widgets to choose from.
-
I am going to search for
CPU. I am after a CPU usage metric.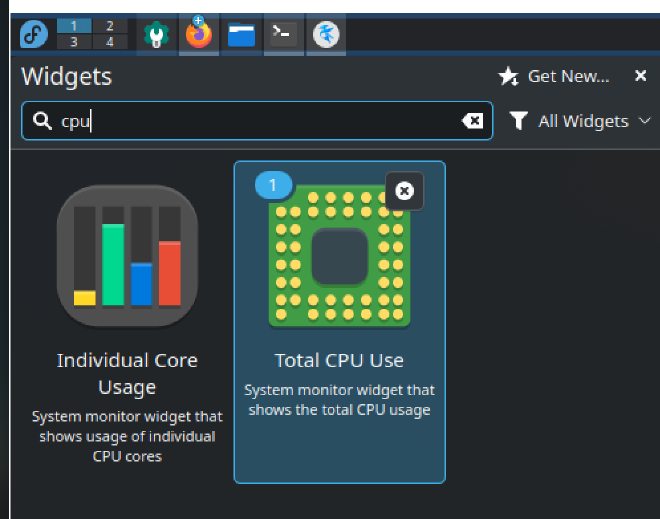
-
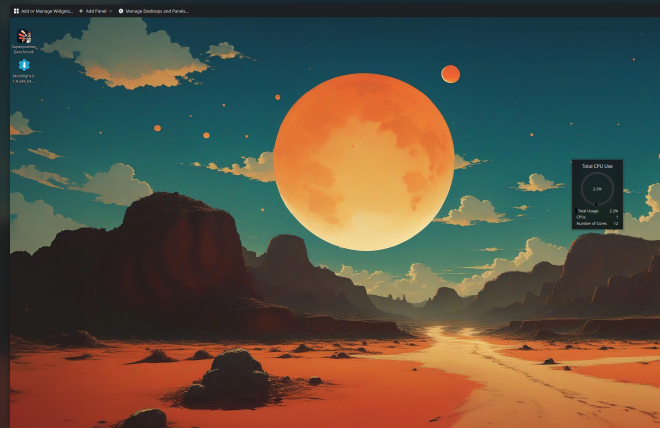
Select the one highlighted here below. It will first dump it to your desktop.
-
You can hover over it and click the icon if you want to view its options for that widget. Each and every widget has these options.
Right-click everything on the taskbar to see all of their options!
-
Now, you can leave it on the desktop if you want, but I want it to be in my taskbar.
-
This is easy—just drag it up there.

Note: You should drag it off the right as shown, then move it once it has been added. KDE seems to be a little picky on this.
- From here you can click and drag to re-order the widgets in the taskbar as you want them.
I would encourage you here, just as everywhere else, to really get in and mess with these different options—just play around!
My Layout #
Here is an example of some of the things you can do to improve the look and feel of the desktop. This is generally how I like to set up KDE:
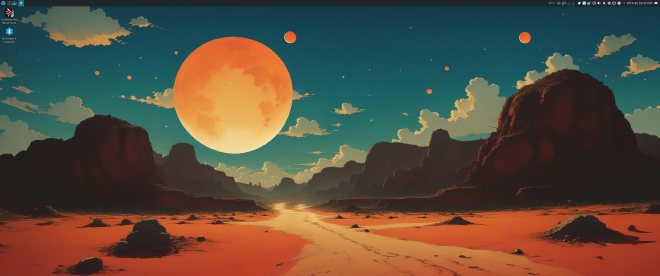
Right-click — and open this image in a new tab to see it fully.
That’s It! #
That’s it for my baseline KDE customizations. Get in there, mess around, and make it yours.
This concludes my Total Fedora Linux Install Guide series – Thank you for reading and hope you found some value in it!