  1. Posts/

Total Fedora Linux Install Guide--Part 1: Installing Fedora KDE, standalone or with Windows

·1237 words·6 mins·
How-to / Guides Fedora KDE Linux
Table of Contents
Total Fedora Linux Install Guide - This article is part of a series.
Part 1: This Article

⚠️ Top Disclaimer
#

It is highly recommended to back up anything you are not prepared to lose. Installing Linux—especially if you’re new or uncomfortable with drive partitioning—can lead to data loss. You may accidentally overwrite your current operating system or important files.

Back up your important files! You Have Been Warned!


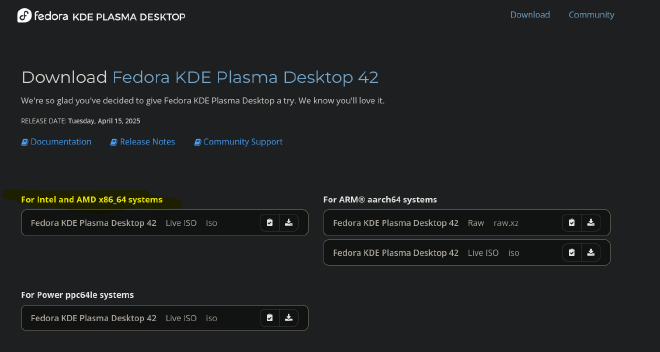
This guide is written for the Fedora KDE Plasma spin, but the process will be largely the same for other Fedora spins. Your mileage may vary slightly depending on which spin you choose.


Introduction
#

Linux is a powerful, secure, and private environment. In this guide, we’ll walk through installing Fedora Linux, specifically Fedora KDE, which utilizes the KDE Plasma Desktop Environment a distribution that is generally more up-to-date than Ubuntu or Debian, but more stable than bleeding-edge options like Arch.

I’ll demonstrate a dual-boot setup alongside Windows, but the process is the same if you want Fedora as your only OS (just skip the Windows resizing section).


Resizing Your Windows Partition
#

Before we get to install Fedora, we gotta make room. To do this, we are going to shrink down our existing Windows install.

In most setups, Windows will occupy your entire disk (C:). So there is no other option other than to shrink it. Now, in the case of some, you might have another drive entirely that you can install Fedora to. If this is the case, you can skip this whole next part.

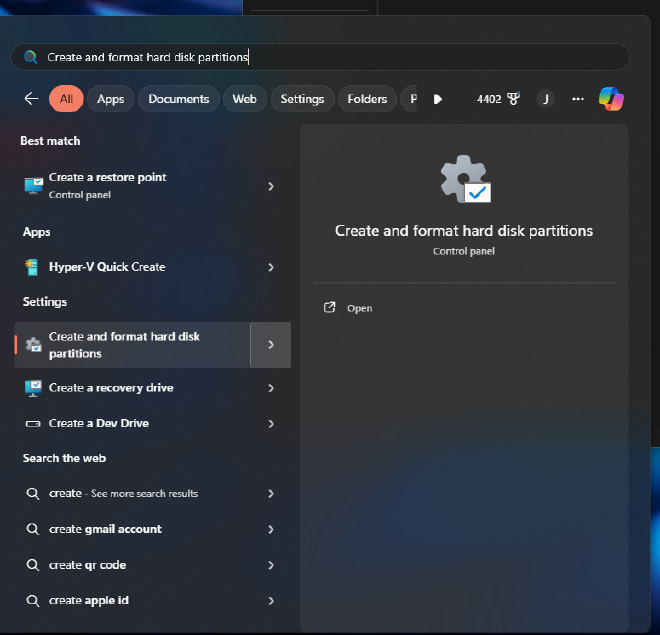
  1. In Windows, search for “Create and format hard disk partitions” and open it.

    Start Menu

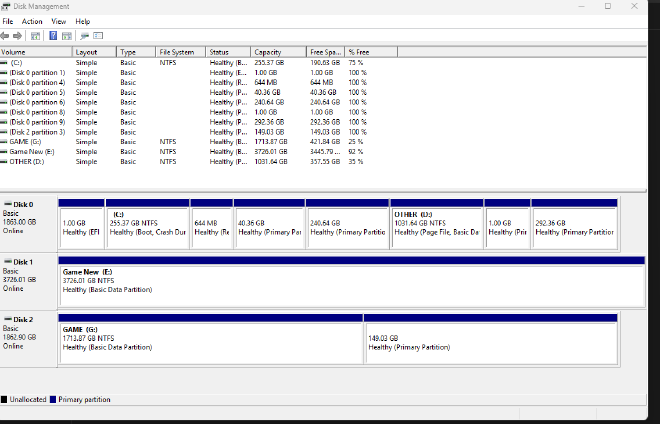
  2. You’ll see a list of your drives and partitions.

    Disk Management

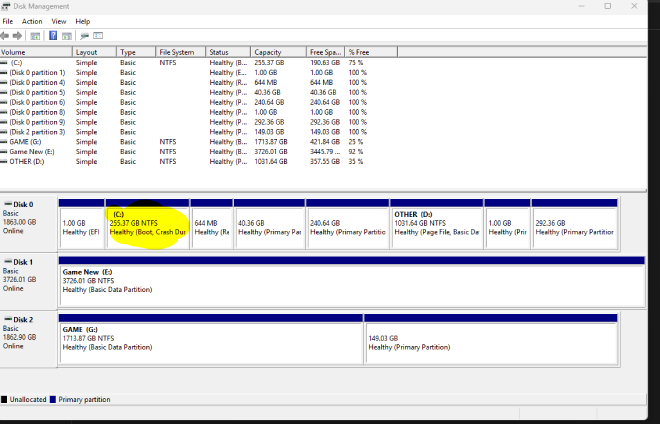
  3. Locate your largest partition, its typically gonna be the one labeled (C:) (As shown highlighted below). Now, in my case its not, but let’s pretend it is.

    C Drive Highlighted

Note: That small partition to the RIGHT of (C:) is the Windows Recovery Partition. It’s used for booting into a recovery environment when your OS corrupts.

Note: That small partition to the LEFT of (C:) is the EFI (Boot) Partition. It’s what tells the BIOS of your motherboard where the OS is that you want to boot from.

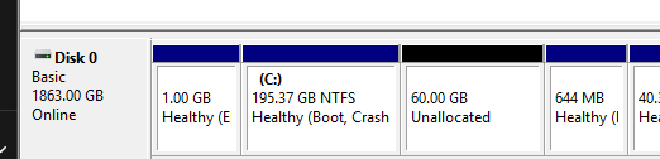
  1. Right-click the (C:) partition and choose “Shrink Volume…”.

  2. Enter the size in megabytes to shrink. I would say 60 GB is about good enough, but of course the more the better. (Just be sure to leave room for your Windows install if you plan to dual-boot this setup) For 60 GB, enter 61440. There is 1024MB in 1GB. Hence 60 * 1024 = 61440

Drive Shrinking

You can only resize the partition to a point where there is existing data. This means if your disk is too full, you will need to delete some stuff before you can resize it!

  1. Click Shrink. You’ll now see Unallocated space next to your (C:) partition. This is where Fedora will install to.

    After Resize

Downloading Fedora KDE
#

Visit the Fedora KDE download page. Choose the option that matches your CPU (typically x86_64 for Intel/AMD systems).

Fedora KDE Download


Creating a Bootable USB
#

You are gonna need a couple things:

  • A USB Flash Drive (at least 4 GB)
  • ISO burning software (I’m gonna show both Rufus and Balena Etcher as options)

I have noticed that some systems, and some drives prefer one tool over the other. In my case, I had to use Balena Etcher for Fedora to boot properly

Rufus
#

  • Download from rufus.ie or the Microsoft Store.
  • Open Rufus. You are gonna see something like this:
    Rufus Interface
    Now don’t panic on me. This may look complicated but its really not. Just follow these directions:
  1. Insert your USB and select it under Device.

    Rufus Device

  2. Select your Fedora ISO file.

    Rufus Device

  3. Click the Start button at the bottom of the interface.

    Rufus Start

  • After this a window will open asking you to pick from ISO mode or DD mode. Choose ISO. (This keeps your drive formatting nice)

Note: Rufus may prompt you to download GRUB modules—accept this.

Balena Etcher
#

  • Download it from etcher.balena.io

  • You’ll notice this one has a more friendly UI. All you have to do is choose your ISO, USB device, and click Flash!

    Etcher Interface


Booting From the USB
#

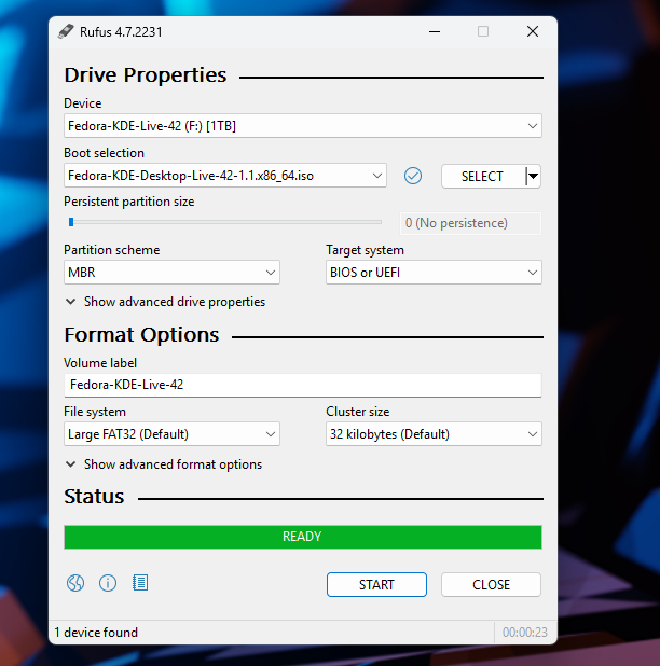
  1. Once the USB boot drive is created, reboot your machine.
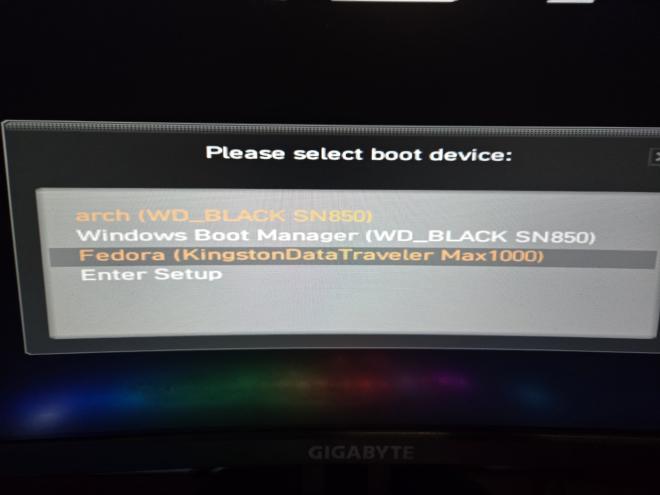
  2. Enter your BIOS/UEFI boot menu. You access this menu by hitting a key immediately on system startup. The exact key will vary depending on your hardware manufacturer.

Common keys include: F11, F12, ESC, and DEL. It will look something like pictured below:

Mash the key over and over until the menu shows up!

Boot Menu

  1. Choose the USB boot drive you created, in my case this is the “Fedora” option.
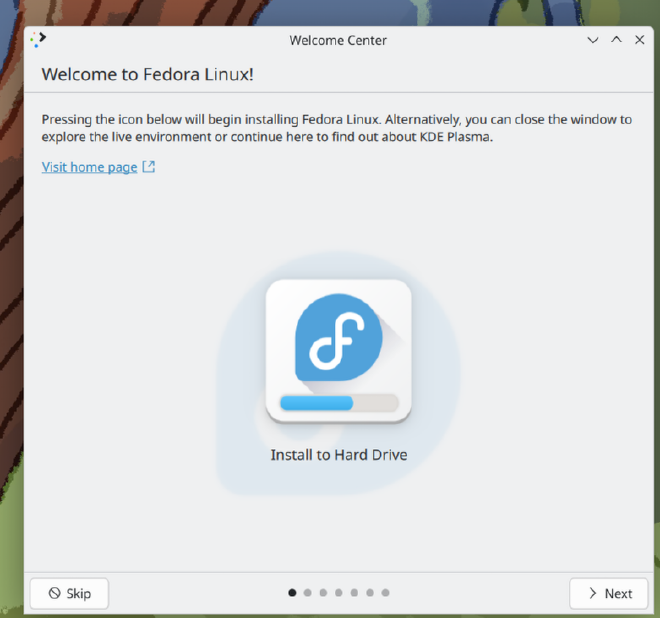
  2. Select “Test this media and start Fedora”.
    This will boot into the live KDE environment.

Live Environment
#

Now we can get to the meat and potatoes of this thing!

Once we are booted up into KDE Live Environment:

You will be presented with the Welcome Center.
Launch the installer by clicking the Install to hard drive icon.

Welcome Center

Select your preferred language

Language
You will come to this summary page
summary

Disk Selection
#

  1. Click Installation Destination as shown

    Installation_Destination

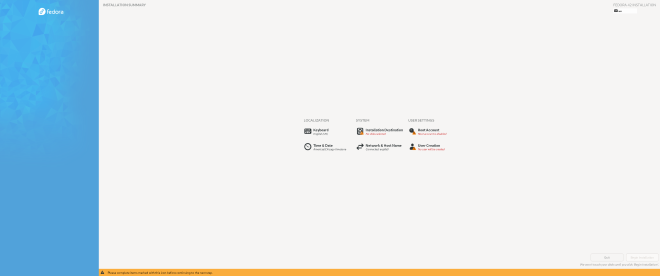
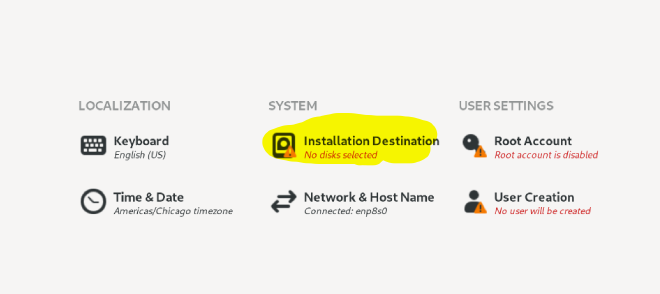
  2. You will come to the Drive Selection screen
    Select the drive that contains the free space we made earlier.

    Disk select

    • Automatic Storage Configuration will be selected by default. If you resized your drive already, just leave this be.

If you did not resize your drive, you do so here by checking the “Free up space” to resize/delete partitions. 
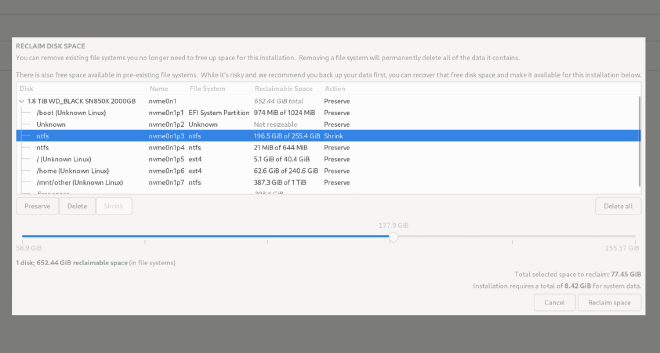
Upon continuing, you will be presented with a GUI where you can resize your partitions. The process is largely similar to the one outlined in windows.

resize

User Setup
#

  1. Skip right on over the root account, and click into the User Creation Section.
    Create_User

Root accounts are not needed since our user will be an admin. This is the secure best practice.

  1. Create a regular admin user with a strong password.
    User_Screen

Begin Installation
#

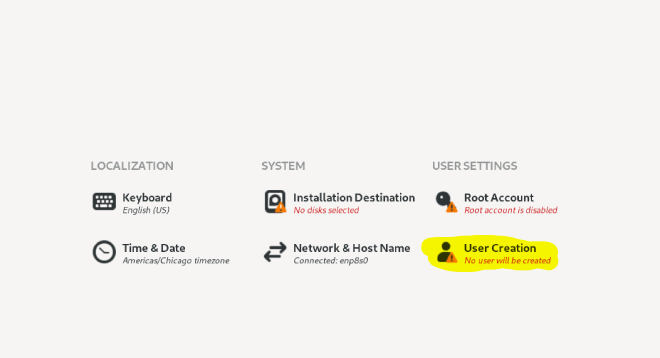
  1. Now, once all of the above steps have finished, click Begin Installation on the Summary Page and wait. Fedora will begin to install to your system.
    This could take some time, be patient.
  2. Once it has finised, click “Finish Installation” and reboot.

Booting Fedora for the First Time
#

When rebooting:

  • Hit your BIOS boot key again.
  • This time, select the new Fedora install from the boot list.

If you see two Fedora entries, remove the USB and reboot.


Choosing Your Default OS
#

It’s important to think about how you boot behavior to be:

  • Want to boot into Windows by default? Do nothing.
  • Want to boot into Fedora by default?
    Change the boot priority in your BIOS settings to Fedora first.

Early Configuration
#

The follow up guide to this one will detail configuration. However, there are a couple of key ones I would recommend doing off the hit

Enable Third-Party Repositories
#

In the Welcome Center, page through the pages and click “Enable Third Party Repositories” when you come to it.

This enables access to some third party software like Steam and others. Its nice to have these should you want them.

Missed it? Search for “Welcome Center” in the KDE menu.

Update Your System
#

  1. Click the shopping bag icon in the taskbar (Discover).
  2. On the left, select Updates and Hit Update All and reboot when prompted.
    Discover Updates

You’re Done!
#

Welcome to Fedora KDE! 🎉

You now have a fresh Linux install just ripe for configuration and enjoyment!

In the next post, we’ll go over some of the deeper configuration and packages I personally use in my system.

Thanks for reading — hope it helped!

Total Fedora Linux Install Guide - This article is part of a series.
Part 1: This Article

Related

Total Fedora Linux Install Guide--Part 3: Ricing out KDE, a Customization Guide
·1445 words·7 mins
How-to / Guides Fedora KDE Linux
Total Fedora Linux Install Guide--Part 2: Configuring and Setting up Fedora
·1597 words·8 mins
How-to / Guides Fedora KDE Linux
Create a Network Bridge on Linux
·715 words·4 mins
How-to / Guides Linux Networking Bridging