
Every junior engineer who asks me what they could be doing better gets the same answer: go build a homelab. So what does that actually look like? Here’s why it’s worth it, even once you have the job, what to run, where to start, and what my own lab looks like.
Watch the Video #
Why Build One #
Honestly, for me, it’s how I made the single biggest leap in my career. The sole senior engineer at my company left, and he left a huge wake behind him. I took over his work: a ton of networking, firewalling, infrastructure and hypervisor stuff like Nutanix. A lot of work.
I could only do that because just four months before, I had gone really deep into my homelab. I spun up OPNsense and started segmenting and securing my network, doing enterprise-style networking to really learn it. And I spun up Proxmox.
Nobody prompted me to go learn this stuff. Nobody told me to go learn networking. It was just because I wanted to learn it that I was able to walk through that door. If I hadn’t, they would have had to hire for that position, and I’d probably still be a junior engineer today.
That was a huge stepping stone for my career. You’ve got to be ready for those, and the only way to be ready for them is doing this stuff at home and continuing to get better.
So why build one? Personal and professional development, so you can walk through a door that opens for you, much like I did.
The Same Tools, Free at Home #
That’s really what a lab gives you. You get to learn the same kind of tools that professionals use day to day, and get comfortable with them in your own environment. And pretty much all of those tools have a free version available, or the tool we use in enterprise is already free.
| At work | At home | Worth knowing |
|---|---|---|
| Nutanix or VMware as the hypervisor | Proxmox VE | Free and open source; a paid subscription adds the enterprise repository and support. Nutanix also has a free Community Edition for learning, and VMware a free ESXi with limits. |
| A big firewall appliance, like FortiGate or Palo Alto | OPNsense | Free and open source. |
| Wireshark | Wireshark | The same tool. Use it at home, use it at work; it’s free. |
| A big SIEM, like AlienVault | Wazuh, Security Onion or the Elastic Stack | Free to self-host. AlienVault itself is now LevelBlue’s USM Anywhere, and its free OSSIM is retired. |
So pretty much everything professionals use, you can use too, in some way or form.
Pretty much, not all: some products only come as a trial. Palo Alto’s VM-Series firewall is a 30-day trial, FortiGate’s VM a permanent trial with tight limits, and Windows Server a 180-day evaluation.
And this doesn’t just stop once you have the job, or you’re already in enterprise. The field is ever evolving and never stops changing, so if you’re not continuing to learn, you will get left behind. This is still very important in my life day to day: always trying new things and trying to keep up to date.
What to Run #
The other big side of this is you get some cool stuff out of it. It’s not all about doing work and using tools and getting better at that stuff; you get some neat things you can build for yourself.
The hardest part for most people starting out is just figuring out what to do in their homelab: what to run, or what to host. So here are some ideas, with what each one needs to start, from its own docs (November 2026).
-
A security lab. If you’re into security, build up some labs and sniff them with Wireshark. Do some packet monitoring, packet inspection.
Wireshark runs on the computer you’re on: about 500 MB of RAM for small captures, and on Windows its installer adds Npcap for live capture.
-
Your own cloud. Things like Nextcloud or Immich. This is a great first project for anybody.
Immich wants 6 GB of RAM (8 recommended) and two CPU cores (four recommended), in Docker on Linux, with room for your photos plus 10–20% for thumbnails, and its database on a local SSD. Nextcloud’s All-in-One Docker setup wants 2 GB of RAM and two cores with any extras turned on, 5 GB and four cores with all of them.
-
A media server. Something like Jellyfin or Plex.
Jellyfin has no set minimum: 8 GB of RAM recommended (4 can do on headless Linux), and a 100 GB SSD for the system and transcoding, plus your media. An old office PC’s Intel graphics can do the transcoding: 6th gen handles HEVC, 7th gen and newer 10-bit HEVC too. Plex wants an Intel Core i3 or equivalent and about 4 GB of RAM. It’s free on your home network, but watching your own videos away from home needs a Plex Pass or Remote Watch Pass, and hardware transcoding needs Plex Pass.
-
A NAS. Just network storage, or bulk storage.
TrueNAS wants a two-core 64-bit CPU and 8 GB of RAM (more for apps and VMs), its own boot SSD of 20 GB or more, and two identical data drives. ECC memory is recommended, not required.
Where Mine Started #
For me, that last one’s how I got started. It all started with a NAS, because I got really upset with YouTube.
I bought Band of Brothers for like 30 bucks on YouTube, and one day I went to go watch it, and it told me this media is unavailable right now. So I paid 30 bucks and still didn’t own it, and that ticked me off. That got me thinking: you know what, I’m just going to own all my own media. If I pay for something, I’m going to own it. I shouldn’t be paying for something that somebody else could just take away whenever they want to.
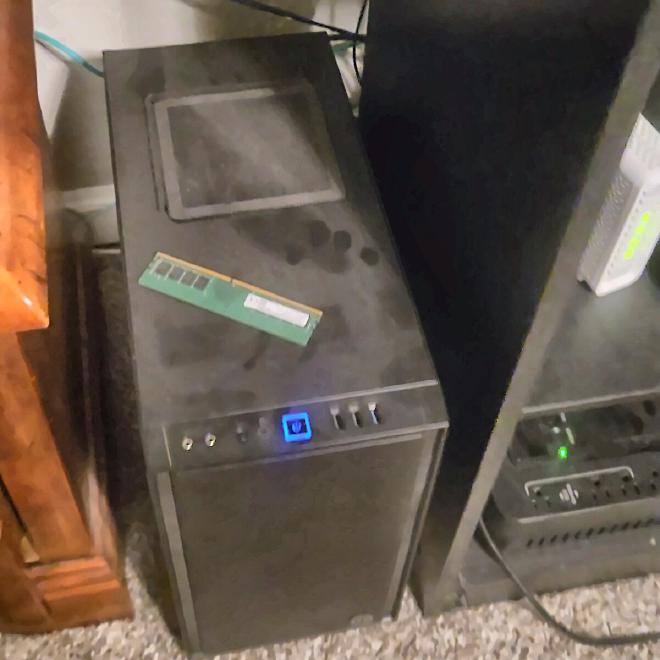
So I took my old gaming PC that I built years ago, built it up as a NAS, bought a couple hard drives, and now I host all my own media with Jellyfin.
Where to Start: Three Steps #
Step 1: Use What You Already Have #
Step one is just use what you already have laying around. That could be just a virtual machine on your PC, for simplicity. It could be an old laptop you have in the corner, or an old PC in the closet. It really doesn’t matter, and it doesn’t need to be very high performance. You don’t need any kind of crazy hardware.
Put Proxmox on an old laptop, put Linux on it, or just run a VM in VirtualBox on your PC. Really, any old thing works here.
You only need to go buy something when you absolutely can’t run the thing you want to run on what you have. That’s the only time you’ve got to go out and buy something.
Step 2: One Always-On Box #
Step two is going always on. That’s when you want something to run all the time, because your main computer can’t really be on 24/7.
For that, a used office PC is a great place to start, like a Dell OptiPlex. It’s perfect; it doesn’t need to be anything special. Or that old laptop in your corner: you can run it headless and leave it on all the time.
A really good place to check is a used electronics recycler, if you have one near you. I’ve got one around me, and it sells these little PCs for really cheap. RAM and storage have gotten just ridiculous pricing right now, the RAMpocalypse, so these recyclers and office PCs are kind of the last frontier for affordable hobbyist tech.
In MemRadar’s sample of Amazon listings, DDR4 went up 107%, DDR5 323% and NVMe SSDs 144% from October 2025 to October 2026. Office PCs are still cheap: on October 18, a refurbished Dell OptiPlex 7040 Micro with a 6th-gen i5 and 8 GB of RAM was $145.
Step 3: Build Out the Network #
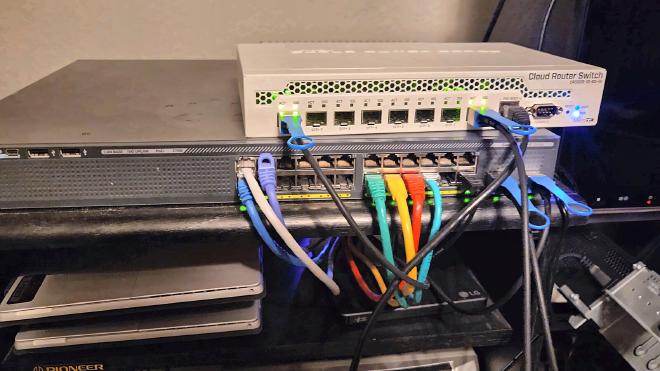
This is the last big thing for me in homelabbing: rebuilding your network into a private, secure network with something like OPNsense. That’s actually what my old gaming PC does now. I turned it from a NAS into the firewall once I got my two Dell towers.
You can do a lot of cool stuff in OPNsense: VLANs and segmentation, DNS sinkholes, and things like Zenarmor for next-generation firewall stuff.
VLANs are separate networks with firewall rules between them. The DNS sinkhole is OPNsense’s built-in Unbound resolver blocking listed domains. Zenarmor’s free edition adds basic application control, filtering and reporting, for non-commercial use.
Then: There’s Always Something New #
After this, there’s always something else new. That could be anything you want to learn or run: getting into some local AI stuff, hosting new things, spinning up new infrastructure. Whatever you want. That’s kind of the cool thing about a homelab: you get to learn and experiment, and continue to grow and get better. And you get some fun, cool stuff at home for yourself.
My Lab #
I still run my homelab on two free Dell towers I got from work. It’s just two Proxmox nodes with a Raspberry Pi as a tiebreaker, what’s called a QDevice. I’m running Jellyfin and Immich and a bunch of other stuff.
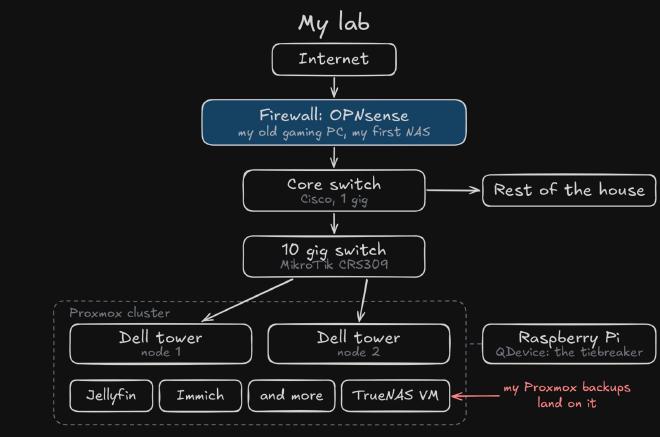
Two nodes have a problem: when one goes down, the survivor holds one vote of two and loses quorum. A QDevice is a small outside box running
corosync-qnetdthat casts the deciding vote, so the survivor keeps two of three. It doesn’t run any VMs.
The stuff you run doesn’t need crazy hardware. I’m hosting pretty much everything I want to host, and I’m just on those two machines.
What I’d Change #
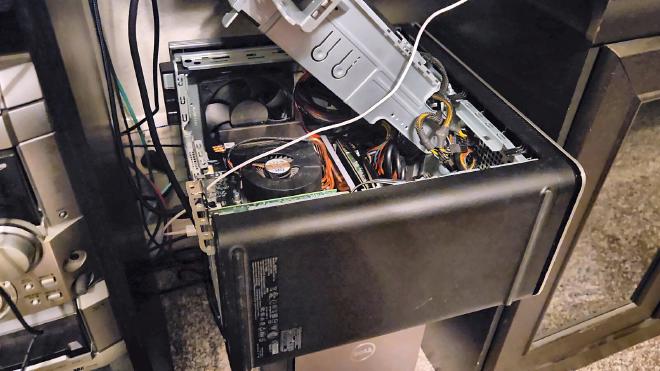
Those Dells were weird to upgrade. On one, adding RAM made a network card stop showing up; on the other, the 10 gig card made a RAM slot disappear. The moral of the story is Dell is weird with RAM sticks. Totally fine when you’re starting out. But if I wanted to upgrade my lab now, I’d probably purpose-build something with enough PCIe lanes, with a bit more room to grow.
Then again, my Dell towers have been running for years, and they’ve honestly treated me pretty good. They were annoying to build in, but they saved me a bunch of money over building something new.
My homelab is honestly fine. I just wouldn’t put TrueNAS on a VM again; that’s kind of it. My Proxmox backups land on that TrueNAS VM, on the same Dells it’s backing up, so my backups depend on the thing they’re backing up. Next time, storage gets its own box.
TrueNAS’s own hardware guide warns against virtualizing it for critical data, and Proxmox recommends a separate physical backup server, so your backups are still there when the hypervisor isn’t.
What Not to Worry About #
Don’t worry about what you don’t have. If you don’t have a rack, enterprise servers or 10 gigabit networking, it doesn’t matter. I’ve got 10 gig now; I didn’t need any of that to start.
You don’t need a huge rack. Most people don’t. The people with racks just do it because it’s awesome, and it really is awesome, but you don’t need that.
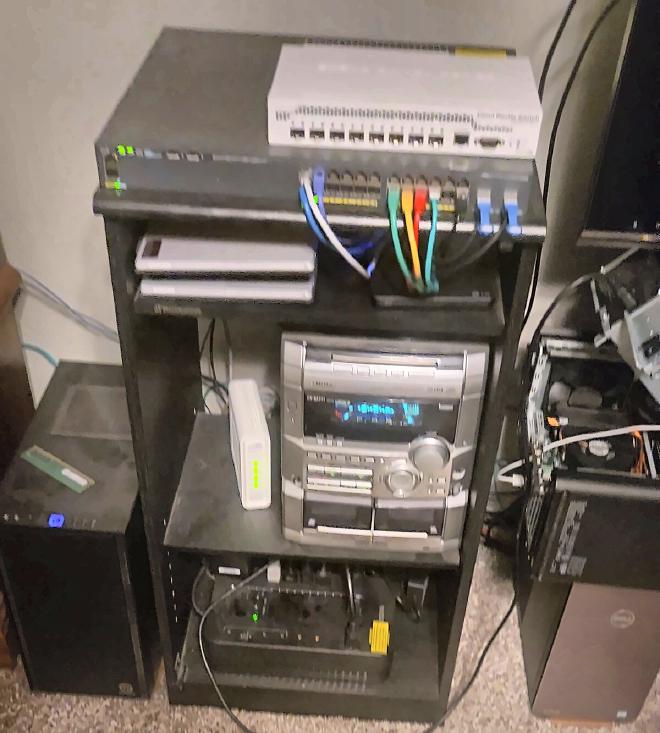
You need way less than you think. Just use what you have and do what you can with it. It’s a super low barrier to entry. Just get in and start having fun.
Start Tonight #
So tonight, grab whatever you’ve got, spin up a VM, pick one of those ideas and get cracking. Then only start walking up the next steps when what you decide to run actually needs it.