
A homelab can be anything. It can be a laptop, or even an old phone. It doesn’t need to be anything impressive. As long as you’re building on it and learning on it, it’s a homelab. So don’t let gatekeepers like that keep you from getting into this field.
The theme of mine is anything I could cobble together for free or very minimal pricing. Here’s every box, what it does, where it came from and what it cost, plus the questionable decisions along the way.
The Short Version #
- Most of it was free. Two Dell towers, two Surfaces, a laptop and a 100 gig switch all came from work on their way to the recycler.
- Only two things were bought new: the Wi-Fi access point, about $100, and the UPS, about $110.
- Two Dells run a Proxmox cluster, with a Raspberry Pi 3 as the QDevice, the tiebreaker vote.
- TrueNAS runs in a VM with the whole SATA controller passed through. Great for starting out on a budget, and the next thing I’m moving out.
- 10 gig on the cheap: Intel X520 cards at $25–30 each, a $30–40 Cisco 2960-X with two 10 gig uplinks, and a fanless MikroTik.
- The firewall is my first gaming PC, running OPNsense.
Watch the Video #
Every Box and What It Cost #
| Box | What it does | How I got it |
|---|---|---|
| Two Dell towers, i7-8700K | Proxmox cluster: TrueNAS VM, Jellyfin and more | Free from work, headed for recycling |
| Two 18 TB hard drives | NAS storage | Refurbished, from ServerPartDeals |
| Intel X520 10 gig cards | 10 gig into each node | About $25–30 each |
| GTX 1060 | Jellyfin transcoding | Came with the Dell |
| Cisco Catalyst 2960-X | 24 gigabit PoE ports, two 10 gig uplinks | eBay, about $30–40 |
| MikroTik CRS309 | Eight 10 gig ports, fanless | Bought used |
| Dell EMC S4128F-ON | 100 gig switch, not in the lab yet | Free from work, busted |
| My first gaming PC, i5-7600K | OPNsense firewall | Built it when I was 18 |
| Two Microsoft Surfaces | Media PC and management box | Free from work, too old for Windows 11 |
| CyberPower UPS | Rides out brownouts and surges | New, about $110 |
| Raspberry Pi 3, 1 GB | Cluster QDevice (tiebreaker vote) | Bought it for school |
| Grandstream access point | Wi-Fi for the whole house | New, about $100 |
| Laptop: i9-12900HK, 64 GB, RTX 3050 Ti | Render box | Free from work, saved from the scrap price |
Only two things in here were bought new: the access point and the UPS. Even the hard drives are refurbished.
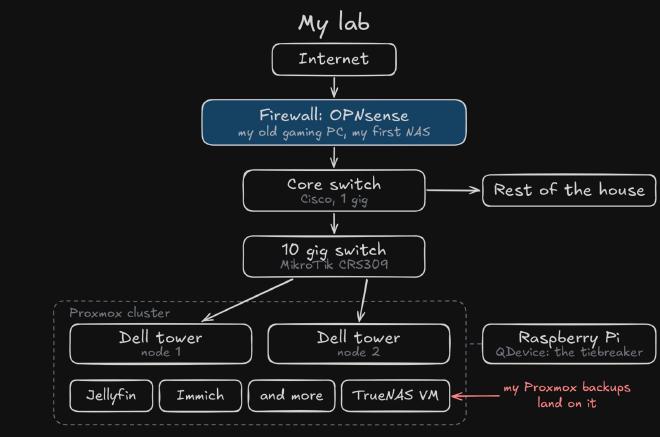
Here’s how it’s wired. I drew this for Why I Tell Everyone to Build a Homelab:
Two Free Dells #
First up are these two Dell towers. I got them free from work. They were headed for the recycle bin, I asked if I could take a couple home, and they said yes. So that’s dope. They run my Proxmox cluster and my NAS.
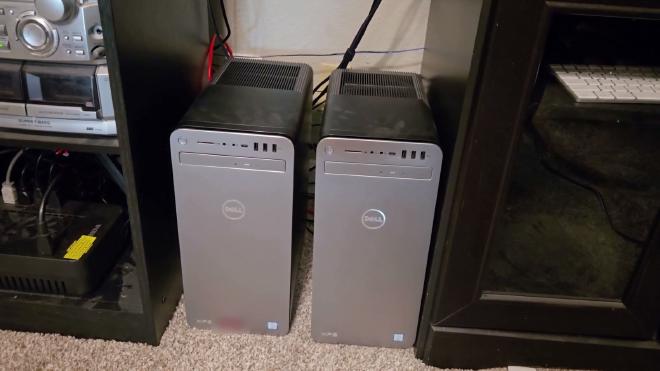
Both run i7-8700Ks, which is honestly pretty dope. One has about 40 gigs of memory and the other has 64. I forget which is which.
There’s always some weird memory stuff with these guys, though. Put too many sticks in and PCIe slots start dropping out; plug in PCIe devices and memory slots fall out. Could be a PCIe lane issue. I don’t know. It’s been really annoying, but they’ve been great otherwise.
Node 1 is the fun one. It runs my NAS, TrueNAS in a VM with the drives passed through, and an old GTX 1060 doing my Jellyfin transcoding. These Dells are always a little funky to open, but the side panel slides right off.
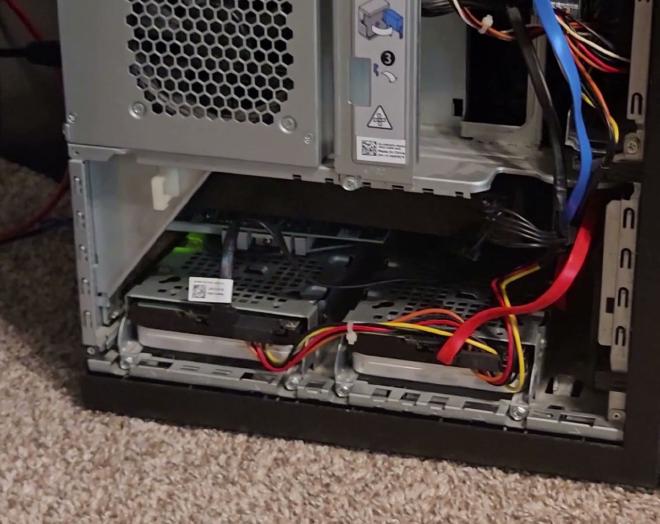
I didn’t always have those drives. The Dells came with drives, so they were free, and I took a few more from work that they were getting rid of. I was running, I think, four of them in RAID 5. These were old, though, and heavily used.
About a month in, I got a random email alert from TrueNAS saying my data was corrupt, or data loss, something like that. I was like, what? So I ran a deep SMART test on that drive and the others. And yeah, she cooked.
That alert only reached me because I’d set up TrueNAS’s email alerts. Set yours up.
That expedited buying drives. I wasn’t going to; I’m a cheapskate. I was going to keep on skating with these free boys, as part of the whole theme. But if I’m buying drives, I might as well buy some big boys. So about six months in, running out of space anyway, I bought two 18 terabyte drives, refurbished from ServerPartDeals, back before hard drives got nutty. They’ve been treating me good so far.
One thing that’s cool in this Dell: it let me pass the drives straight through to the TrueNAS VM. That’s what TrueNAS wants when you virtualize it: full access to the drives. You don’t have to have it, but for it to work the best, that’s what it wants. This Dell let me pass through the entire SATA controller, and it actually worked.
Inside there’s also a 10 gig network card, an Intel X520. That was like 25, 30 bucks. Super cheap. PCIe Gen 2.
And that’s my old GTX 1060. It’s not a very impressive GPU. It came with the Dell, and it transcodes all of my Jellyfin media. It does a great job with that. I wrote up how to pass a GPU through to Jellyfin in GPU Transcoding with Jellyfin.
Around the back, each node has the regular gigabit port off the motherboard plus the 10 gig card. Both run up to the networking stack: the gigabit into the Cisco, the 10 gig into the MikroTik.
The Network #
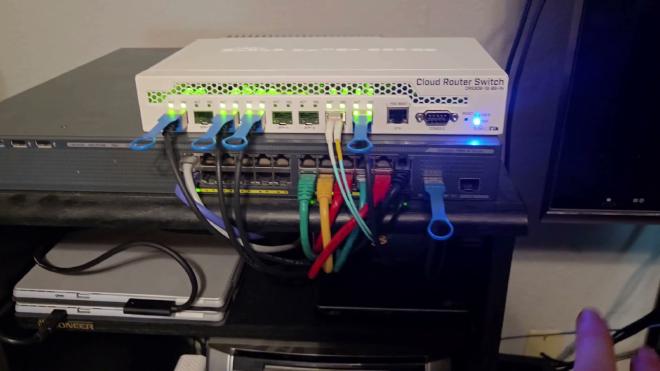
This is my Cisco, a Catalyst 2960-X. I got it for like 30, 40 bucks on eBay. The theme of this whole homelab again: cheap, cheap, cheap, but good. I like this one because it’s got 24 gigabit ports, but it has two 10 gig uplink ports. I really wanted a 10 gig uplink from my firewall when I was building this out, so that was nice to find.
Why 10 gig if your house is on gigabit? Say you’ve got three people all doing gigabit stuff. With a 10 gig pipe, all three can do gigabit things at the same time, because your overall pipe is 10 gig. Even though every device in the house only talks at one gig, the extra pipe helps combined, aggregate throughput.
That’s traffic through the firewall: between VLANs and out to the servers. Your internet speed is still whatever your ISP sells you.
It’s a PoE switch too, so you can run IP cameras and things off it, and it’s really pretty quiet. But if you loaded up all 24 ports with PoE power, the fans would kick up, so it might get a little more annoying to have in your home. Honestly, it’s pretty great.
The 10 gigs run up to this MikroTik switch, a CRS309. It has eight 10 gig ports, which is pretty nice. Most of them run direct attach copper cables. I like those because they just kind of work. One goes the distance back to my gaming PC, so that one’s regular fiber. The MikroTik is fanless: it’s got a giga heatsink on the back that works pretty good.
The firewall’s 10 gig trunk runs into the switches, and the two switches are trunked together at 10 gig. But I didn’t start out with 10 gig. I built most of this two years ago and just gigabitted it straight; I always had the 10 gig uplink from the firewall. The rest was an upgrade earlier this year.
The Free 100 Gig Switch #
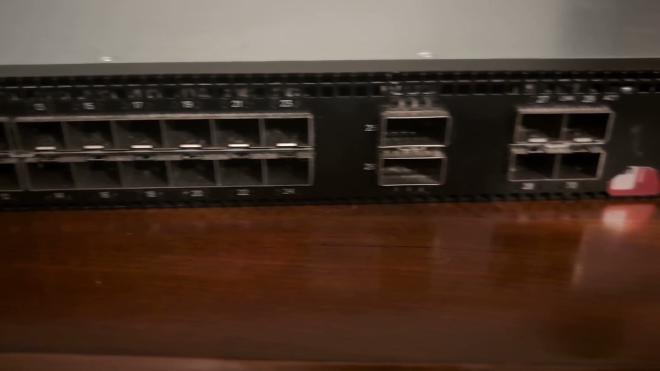
This is a Dell EMC S4128F-ON, a 100 gig switch. The small ports are 10 gig (I said 25 in the video; they’re 10), and the two big ports are 100 gig. And I got it free, again, you guessed it, from work, because it’s busted. Dual power supplies in the back. This is full enterprise stuff.
The problem with it is the fans are stuck at full blast, 100%. I figured out why, but I’m going to tease you a little. I started filming me reviving it, and that’s going to be a video all its own.
The Firewall: My First Gaming PC #
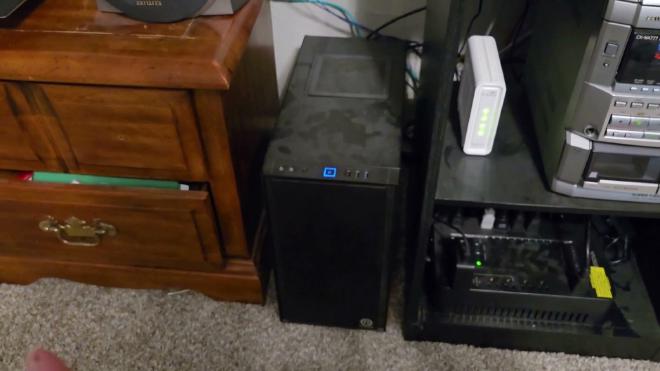
I built this PC when I was 18. It was my first ever gaming PC: an i5-7600K, and back then an RX 570. It’s no longer a gaming PC, so there’s no GPU in it. It’s just an ITX motherboard for no reason, because that’s what I did when I was 18.
It runs OPNsense with Zenarmor and sinkholes, and that old i5 does phenomenally.
It wasn’t always a firewall. It started life as my NAS. When the Dells showed up, I moved the NAS into a TrueNAS VM on Proxmox, so this box opened back up for firewalling. I didn’t want to waste one of those beefcake 8th-gen Intel CPUs on just being a firewall. Beefcake, I know.
One funny thing about it as a NAS: it was so jank. It doesn’t have any drive bays, so I stuck an old drive to the side panel with double-sided sticky tape. It actually worked for a good little while, no problems. When the NAS moved, those very expensive drives got mounted properly. I think that was for the best.
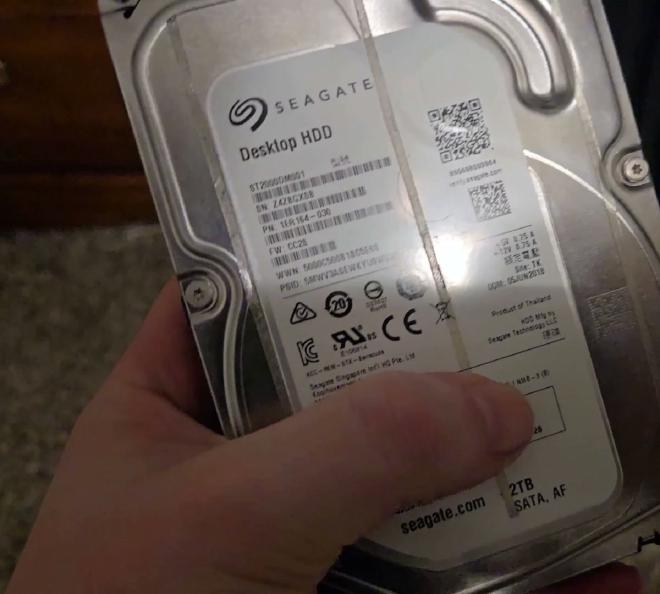
Around the back are the 10 gig port and an extra gigabit network card. For OPNsense you need an input from your modem. Mine’s an aftermarket, third-party modem that works with my ISP: coax from the wall into the modem, then Cat5 from the modem into the firewall. That’s my internet in. The 10 gig port goes out to the switch. That’s my firewall trunk.
I put the extra card in because I didn’t know if it was going to be compatible with OPNsense. I probably didn’t need it, but it’s nice to have more NICs.
In the video I said you need at least two NICs for OPNsense. You don’t, strictly: with VLANs and a VLAN-aware switch, one NIC can carry both the internet side and your networks. Two is just simpler.
Two Free Surfaces #
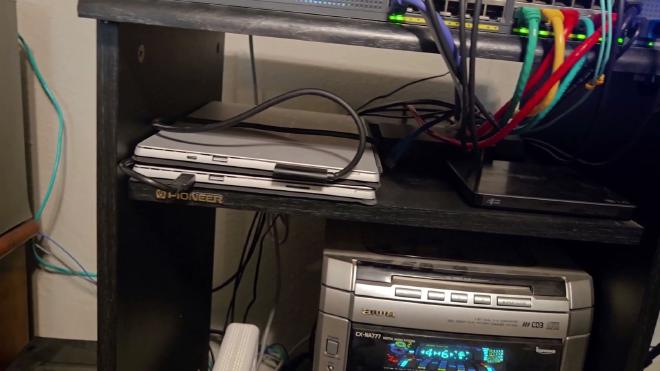
Then I’ve got a couple of Microsoft Surfaces, and, you guessed it, they also came free from work. They’re old and not supported for Windows 11 anymore, so I took them home for freezies.
The bottom one is my media PC. It runs a non-smart TV, so that’s really nice. The top one is my management box. In my VLANs video, How I Do VLANs in Enterprise Networks, I talked about management boxes and management networks. I’ve got one at home too: this Surface is the only machine that can talk to the rest of this stuff at a management level. It has all my tools on it, and I can remote into it from any machine I’m using, so there’s one spot for all my stuff.
The sound system is just from the nineties. It’s not part of the lab. I’ve had it forever, it works pretty good, and it makes fun little didgeridoos on the front.
The Pit of Despair #
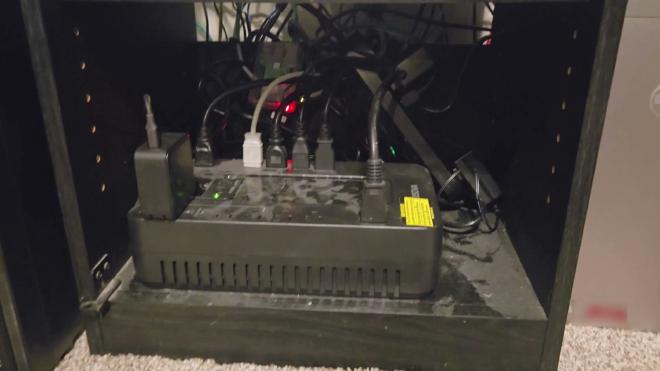
Down here is what I call the pit of despair, because if you look in there, it is disgusting. That’s a CyberPower UPS, about $110, and it runs everything. A UPS is really important, particularly for brownouts, where the power flickers on, off, on, off. That’s really hard on electronics. Even if you don’t set up NUT and go the whole mile with graceful shutdowns, a UPS is still really nice to have, and it helps with surges too.
I’ve got multiple power strips in there, all jank. When I built this, I promise I tried to cable manage it. There are remnants of Velcro in the back. Two years later, I just plug stuff in. Maybe I’ll come back and fix that up.
The Raspberry Pi QDevice #
Way in there is a Raspberry Pi 3 with a gig of memory. I had to buy it for school for some reason. It’s low power and low memory, but its whole purpose in life is to watch these two nodes and be the tiebreaker. Technically, it’s a QDevice.
With only two nodes, when one goes down, the cluster is unhealthy and the other node goes read-only, so you can’t make changes. That’s totally fine; it’s no reason not to cluster them. But if you still want to turn VMs on and off and change the cluster while one node is down, you need a third vote, and it doesn’t need to be a full Proxmox node. It can be a Raspberry Pi.
A QDevice is Proxmox’s external vote for the cluster. It doesn’t run any VMs.
Wi-Fi #
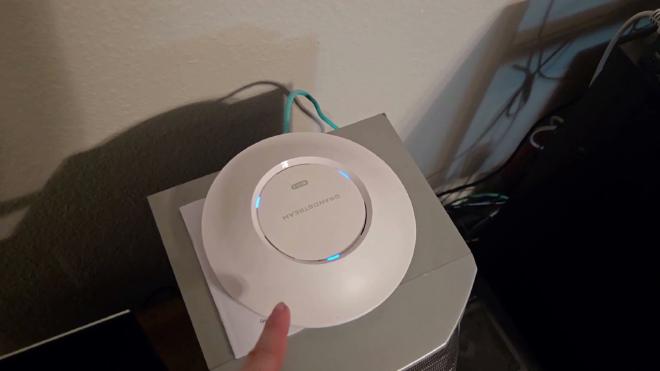
That’s my Wi-Fi access point, a Grandstream. I started out with Ubiquiti, but it got super annoying having to run their controller software, and I got kind of tired of that. Then Home Network Guy did a video on these Grandstreams, and they were great. Shout out to him: he inspired a lot of this build, and he taught me a lot about networking through his videos.
It was about a hundred bucks, and I bought it new. It’s enterprise class, and I’ve got coverage of my whole house from that one little disk.
The Render Box #
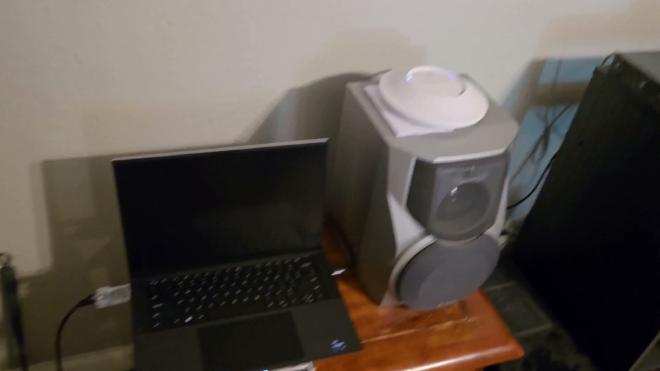
Right there is another laptop that, you guessed it, came free from work, because there was a problem with it. Its USB devices kept dropping out on Windows: drop out, drop out, drop out. It was useless, and it sat around for years. Finally there was a big recycling push, and the recycler was only going to give a scrap price for it because it was broken. So I figured, if he’s going to give us nothing, I’ll take it home.
And crazily enough, maybe it was Windows. I did update the BIOS firmware, and maybe that helped, but on Linux nothing’s dropped out so far. It’s an i9-12900HK with 64 gigs and an RTX 3050 Ti, and it plugs into the switch with a little Framework 2.5 gig Ethernet card. Those things are super clutch.
I’ve got it jankily set on CDs to get some airflow under there. Don’t hate it if it works, because it does. It still runs like 100 degrees all the time. I set it up so I could render videos overnight, so the machine on my desk doesn’t need to be on all the time keeping me up. It’s a little slower than my desktop, obviously, but it was free, and at 3 a.m. it doesn’t really matter.
What’s Next: A Dedicated NAS #
I hope this proves you don’t need a ton. This is actually even more than I need. Where I’m starting to get a headache is memory: I’m doing more labs, especially for making videos, so one thing I might do is upgrade these or build new.
TrueNAS virtualized is great, and I recommend it for anybody starting out, especially on a budget. But what’s next for this homelab is moving it off of there onto a dedicated NAS. My backups depend on Proxmox, and Proxmox VMs depend on the backups. That’s a circular dependency, and it’s been that way for two years. It’s been fine, but since I’m itching to upgrade, transplanting that VM onto a dedicated NAS is next.
TrueNAS’s own hardware guide warns against virtualizing it for critical data, and Proxmox recommends a separate physical backup server, so your backups are still there when the hypervisor isn’t.
That’s the Lab #
This has been two years of an extremely cheap homelab: mostly recycled garbage, or so most people would think, or at least your employer might. It’s easy to replicate. Go to a recycler and just pick this stuff up.
I know it doesn’t look like much, but I’m doing some really cool stuff on those Proxmox nodes. This one was the hardware; a future video is what I’m actually running on them. If you’re still deciding whether to build one at all, start with Why I Tell Everyone to Build a Homelab.
Sources #
- Proxmox: cluster manager, external vote support (QDevice) and Proxmox Backup Server installation
- TrueNAS: hardware guide, virtualized TrueNAS
- Network UPS Tools (NUT)
- OPNsense and Zenarmor
- Home Network Guy on YouTube